How to Track Email Revenue in Shopify (The Right Way)
The complete guide to connecting your email program to real Shopify revenue — from UTM setup to the metrics industry leaders actually track.
Stop Guessing. Start Tracking.
This article walks you through exactly how to set up email revenue tracking in Shopify, from UTM parameters to GA4 to the metrics that actually matter. If you'd rather have it done for you, we can have everything set up and tracking accurately within the week.
Most email platforms show you opens and clicks. But those metrics don't pay for your ads. If you want email to actually scale your business, you need to track what matters: revenue. Here's how to build a system that connects every campaign, flow, to Shopify that sends accurate data to your dashboard.
The real problem: you don't know what's working
Email is one of the highest-ROI channels in ecommerce. Studies regularly cite returns between $36 and $45 for every dollar spent. But that number only holds if you can actually measure it accurately and most Shopify stores can't due to a lack of understanding how everything connects.
Brand owners know emails are going out. They see sales coming in. They might even attribute some revenue to email in a vague, hand-wavy kind of way. But ask them which flow is driving the most orders, which campaign actually converts, or which segment is most valuable and they go quiet. That's not a small gap. That's the entire foundation of a scalable email program missing. If you can't answer those questions, you can't improve, you can't justify investment, and you can't replicate what's working. This guide closes that gap.
Why opens and clicks don't matter
Open rates tell you whether your subject lines are doing their job. Click rates tell you whether your content is compelling enough to get someone off the email and onto your site. Both are useful diagnostic tools. Neither one tells you whether anyone bought anything.
This is where most email programs get stuck. They optimize endlessly for open rate, testing subject lines, sending times, preview text and end up with a list full of engaged non-buyers. They improve click rate and drive traffic that doesn't convert. The campaigns look healthy on the surface, but the revenue isn't there to back it up. The only metric that actually connects your email program to your business is attributed revenue and how much money did this email generate? Until you optimize for that, you're chasing numbers that don't matter.
631How to Setup UTM parameters
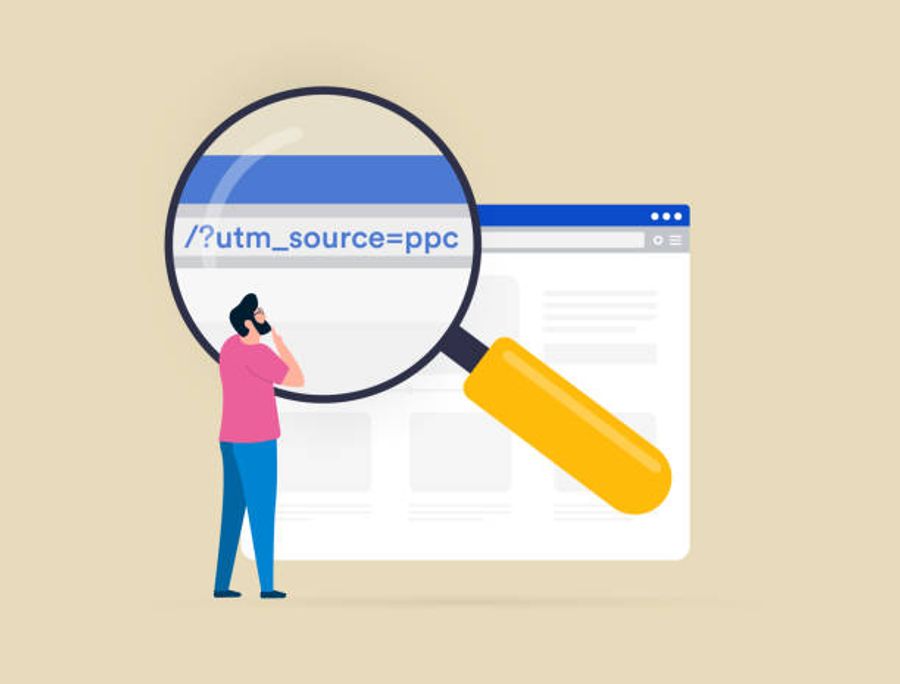
If you're not using UTMs, your tracking is broken. Not imperfect but literally broken. UTMs are small tags appended to the links inside your emails that tell Shopify exactly where a visitor came from before they purchased. Without them, Shopify can't tell the difference between a click from your abandoned cart flow and a click from your weekly promotional campaign. It all collapses into a single "email" bucket or worse, into "direct," which is traffic Shopify can't trace to any source at all.
A properly tagged link looks like this: yourstore.com/products/item?utm_source=klaviyo&utm_medium=email&utm_campaign=spring_sale_2026.
What Makes up a UTM?
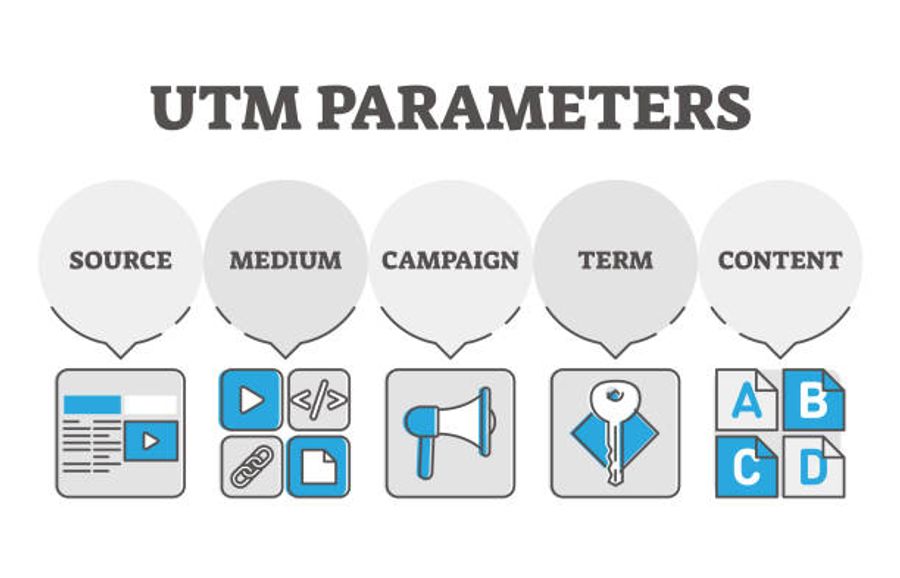
The source: your email platform.
The medium: should always be email as this is the value that tells Shopify and GA4 which channel to file the visit under.
The campaign: the specific send, named in a way that's descriptive and consistent. The Content: This parameter is optional, but useful if you're testing multiple links or CTAs within the same email and want to know which one actually drove the click.
The most important UTM rule is consistency. Many owners run into the issue of using email, Email, and e-mail as their source but this will create three entirely separate sources in both Shopify and GA4.
Rules to follow when setting up your UTMs
- Always use lowercase — email not Email, klaviyo not Klaviyo
- No spaces — use underscores instead: spring_sale_2026 not spring sale 2026
- utm_medium is always email — never Email, e-mail, or anything else
- Name campaigns descriptively — abandoned_cart_day1 tells you more than flow1
- Apply tagging to flows, not just campaigns — flows are where most revenue hides
- Document your naming convention and share it with anyone who touches email
- Never deviate once the format is set — one inconsistent send splits your data
- Enable auto-tagging in your ESP — don't rely on doing this manually
- Verify after your first tagged send — pull the Shopify report and confirm data is flowing before assuming it works
The fastest way to get this right is to stop tagging links manually and turn on auto-UTM tagging inside your ESP.
- In Klaviyo, go to Settings → UTM Tracking and toggle it on then you’ll be able to cuse dynamic variables like {{campaign_name}} so the campaign tag populates automatically for every send.
- In Mailchimp, enable Google Analytics link tracking inside campaign settings.
- In Omnisend, find it under Campaign settings → Tracking. Once it's on, every link in every email campaign or flow gets tagged without you thinking about it.
632How to see email revenue in Shopify

Once UTMs are in place, Shopify starts capturing source data at the session level automatically. Every time someone clicks a tagged link and lands on your store, Shopify logs where they came from and associates any purchase in that session with the originating source. The data surfaces in two places.
Total sales by referrer
The first is the Total sales by referrer report, found under Analytics → Reports → Sales. This report shows you orders and total revenue grouped by the source that referred the visitor, so you can filter down to email traffic and see exactly how much revenue each source drove. This is the clearest view of email-attributed revenue in Shopify and the report you should be checking after every significant send.
Acquisition reports
The second is the Acquisition reports section under Analytics → Reports → Acquisition. These reports show sessions and traffic data rather than sales figures, so they won't show you revenue or order counts directly. What they will show you is where your visitors are coming from, how much traffic email is driving relative to paid social or organic search, and how those session volumes are trending over time. Used alongside the Total sales by referrer report, you get the full picture: the Acquisition reports tell you how much traffic email is sending, and the Total sales by referrer report tells you how much of that traffic is converting into revenue.
Shopify uses last-click attribution.
If a customer clicked your email, then returned to your store two days later through a Google ad, the sale is credited to Google, not the email. This is why your ESP dashboard will almost always show higher revenue than Shopify Analytics. Neither number is wrong. They're measuring different things. Your ESP reflects email's influence on a purchase. Shopify reflects email's role as the direct closer.
Tools to Help Track Acquisition & Customer Journey
If you want to see every touchpoint a customer had with your brand before they bought, meaning you want to see every link click, every site visit, every ad impression then there are tools built specifically for this. They track customer journeys using first-party data and IP matching, so you can see the full path from first touch to purchase, not just the last click Shopify gives credit to.
Triple Whale
The most widely used tool for this in DTC ecommerce. Triple Whale reconciles the gap between what your ESP claims and what Shopify reports, and shows you exactly how much credit email deserves across the full journey, not just when it was the final touchpoint.
Northbeam
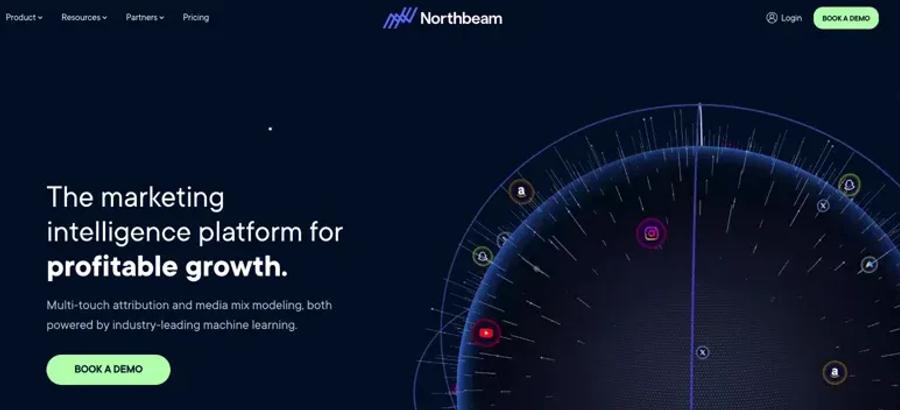
Northbeam does the same thing with a stronger focus on paid channels, but covers email attribution as well. If you're running paid social and email together and can't figure out which one is actually driving purchases, this is the tool for that.
Elevar
Elevar is a bit different; it acts as a server-side tracking solution that ensures every click, conversion, and customer event on your Shopify store is being captured and passed correctly to every tool connected to it. While Triple Whale and Northbeam sit on top of your data to reattribute credit, Elevar goes underneath, fixing the tracking before the data reaches your tools. The result is that everything downstream reports more accurately, including Shopify and your ESP. And because it operates at the data layer, it actually makes Triple Whale and Northbeam more accurate too. A lot of serious DTC brands run all three together for that reason.
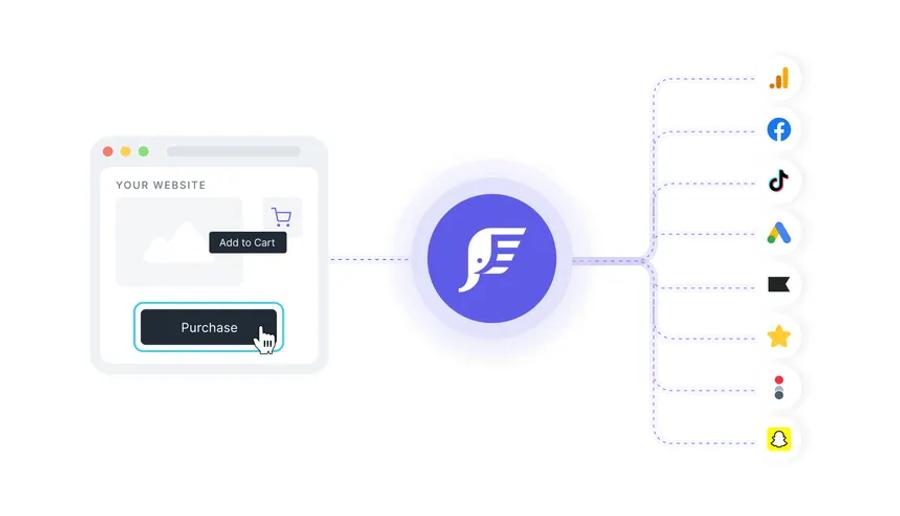
Note: Elevar doesn't generate or manage UTMs, you still need those set up correctly in your ESP. What it does is make sure that when someone clicks a UTM-tagged link and lands on your store, that data is captured and passed correctly through checkout without getting dropped. UTM data gets lost more often than people realize, especially on mobile, during redirects, or across multi-session journeys. Elevar keeps it intact so the attribution you're expecting to see in Shopify and GA4 actually shows up.
These tools won't change how Shopify attributes revenue. What they do is give you a second source of truth, one that credits email for the role it actually plays, even when Google or Meta gets the last click.
633Why you should add GA4
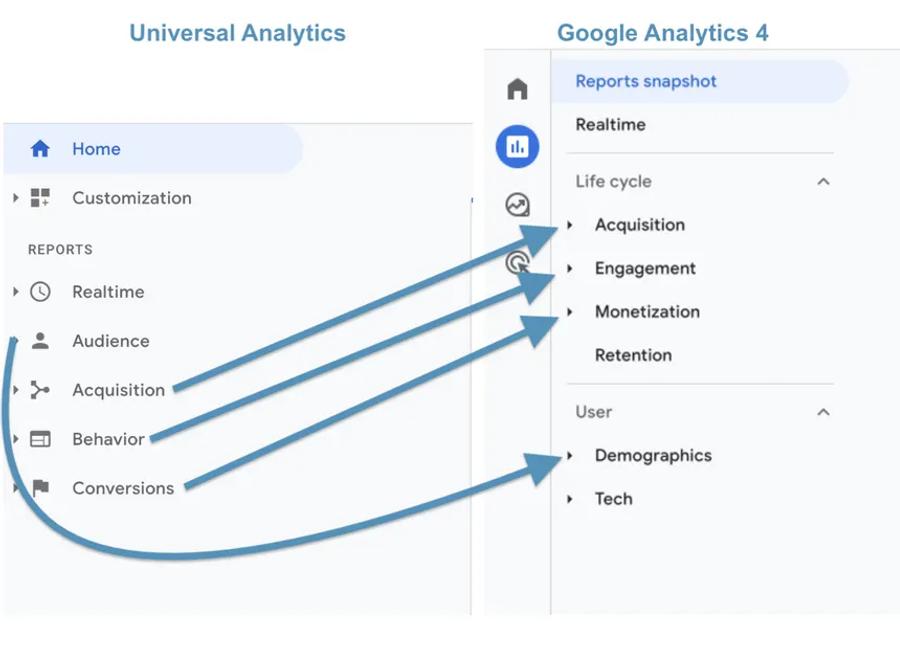
Shopify tells you what made money. GA4 shows you how it happened. With GA4 connected to your store, you can go deeper than revenue totals and you can see which email campaigns drove the most engaged sessions, which landing pages those visitors converted on, how far into the purchase funnel email traffic typically gets before dropping off, and how email fits into the broader customer journey alongside paid and organic channels.
How to setup GA4 in Shopify
- Add your GA4 Measurement ID, it starts with G-, in Shopify under
- Online Store → Preferences → Google Analytics.
- GA4, go to Admin → Data Streams → your stream → Enhanced
- Measurement and enable all purchase and checkout events.
- Once that's done, go to Reports → Acquisition → Traffic acquisition
- Add a filter for Session medium = email, and break down by Session campaign.
You'll be able to see revenue, conversion rate, and engagement data per send which is where the real optimization starts.
634Tracking revenue inside your ESP

Your email platform should also be tracking revenue directly. When your ESP is connected to Shopify through the native integration, not just through UTMs but through the full data sync, it pulls order information back automatically and attributes it to the campaign or flow that drove it. This gives you revenue visibility without leaving your email platform, and it works at the individual flow level, so you can see exactly how much your abandoned cart sequence, your welcome series, and your post-purchase flow are each generating.
In Klaviyo, revenue is attributed within a five-day window by default, though you can adjust Account Settings depending on your buying cycle. You can view per-campaign revenue under Campaigns → select a campaign → Revenue, and per-flow revenue under Flows → select a flow → Revenue.
Mailchimp, connect your store under Integrations → Shopify and view revenue per campaign under Reports.
Omnisend's Sales Dashboard under Reports gives you a combined view across campaigns, automations, and channels, useful for seeing the full picture without pulling reports separately.
635The revenue metrics industry leaders actually track
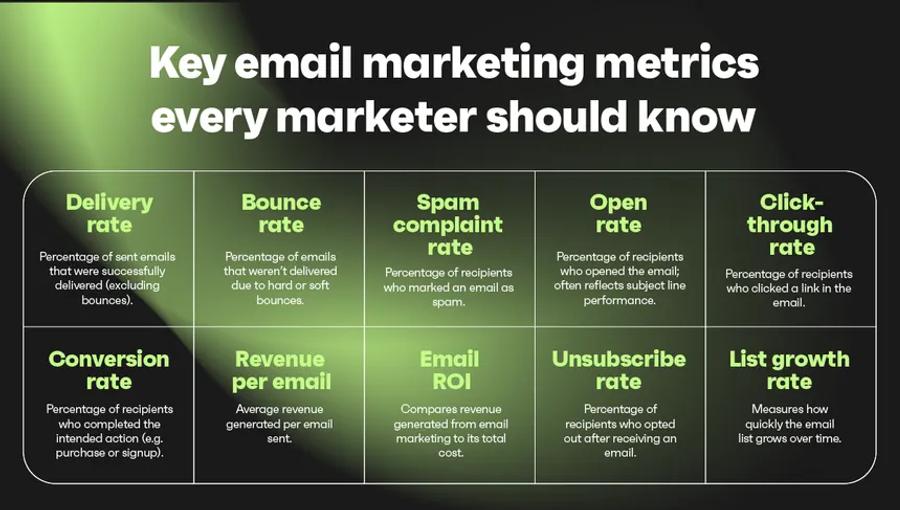
Most brands look at open rate and click rate because their ESP puts those numbers front and center. The brands generating the most revenue from email track something different entirely.
Revenue per recipient
This is the most important number in your email program. It's the total revenue from a send divided by the number of emails delivered, and it's the only metric that lets you compare sends of completely different scales. A campaign sent to 500 VIP customers and one sent to 50,000 subscribers aren't directly comparable on total revenue alone. Revenue per recipient tells you which one was actually working harder, and whether a campaign is worth repeating or a flow is earning its place in your automation stack.
Email conversion rate
This is orders from email divided by emails clicked, tells you whether your landing pages and offers are doing their job once someone leaves the email. A strong click rate paired with a weak conversion rate means the problem isn't the email. It's what happens after the click, whether that's the page, the offer, or the friction in your checkout.
Average order value for email traffic
This is worth tracking separately from your site-wide AOV. Email buyers consistently spend more per order than visitors from paid social or organic search. Knowing that gap gives you leverage when making the case for more investment in the channel, and it tells you which segments or flows are attracting your highest-value customers.
Email revenue share
This is the percentage of your total Shopify revenue that comes from email, is the benchmark that tells you whether the channel is pulling its weight. Well-run DTC brands typically sit between 25 and 40 percent. Below 20 usually points to underinvestment in flows, weak segmentation, or a list that isn't being mailed frequently enough. Above 50 can signal over-reliance on your owned audience and underinvestment in acquisition, a setup that works until your list stops growing.
List growth rate
This is one that gets overlooked. If your revenue share from email is healthy but your list isn't growing, you're running out of runway. The best email programs treat list growth as seriously as list monetization, because a shrinking or stagnant list means the channel has a ceiling.
Flow revenue share
Is the percentage of your total email revenue that comes from automated flows versus manually sent campaigns, tells you how well your program is working while you're not actively sending. Industry leaders typically see 40 to 60 percent of their email revenue coming from flows. If yours is significantly lower, your automation stack is underbuilt and you're leaving predictable, recurring revenue on the table.
636Where to start: Step By Step Instructions
If you're building this from scratch, the order matters. Each step makes the next one more useful.
Step 1: Enable UTM auto-tagging in your ESP
This is the foundation. Everything else depends on it. Without tagged links, Shopify can't tell where your traffic came from and every other piece of reporting falls apart.
Klaviyo: Settings → UTM Tracking → toggle on Mailchimp: Campaign settings → Google Analytics link tracking Omnisend: Campaign settings → Tracking
Step 2: Connect your ESP to Shopify
Not just through UTMs, but through the full native integration. This is what pulls order data back into your email platform so you can see revenue at the campaign and flow level without leaving your ESP.
Klaviyo: Built into onboarding, or go to Integrations → Shopify Mailchimp: Integrations → Shopify Omnisend: Integrations → Shopify
Step 3: Install GA4 and enable ecommerce tracking
Shopify tells you what made money. GA4 shows you how it happened, which landing pages converted, where visitors dropped off, and how email compares to your other channels across the full journey.
Add your GA4 Measurement ID in Shopify under Online Store → Preferences → Google Analytics. Then in GA4 go to Admin → Data Streams → Enhanced Measurement and enable all purchase and checkout events.
Step 4: Send a campaign and verify the data
Before assuming everything is working, confirm it. Send a campaign, wait 24 hours, then pull the Sales by traffic referrer report in Shopify and check that your UTM source is showing up correctly. This step gets skipped more than it should. It's the fastest way to catch a tagging error before it corrupts weeks of data.
Step 5: Set a weekly review cadence
Every Monday, check three numbers across your most recent sends: revenue per recipient, email conversion rate, and email revenue share. A simple spreadsheet works fine here. Tools like Klaviyo's built-in reporting, Triple Whale, or Northbeam can automate this view if you want it consolidated in one place.
Step 6: Start comparing
After a few weeks of baseline data, go deeper. Flows versus campaigns. Segments versus full list. Different landing pages for the same offer. This is where the compounding starts. Small, consistent improvements to these numbers add up to meaningful revenue gains over months without increasing your list size or sending frequency.
637Common mistakes to avoid
Not tagging links inside automated flows. Flows often drive more revenue than campaigns but get ignored in reporting because they don't feel like sends. Comparing Shopify and ESP revenue numbers directly as if they should match. Letting UTM naming drift across team members or sends. Not filtering out internal traffic from your own IP address, which quietly inflates session counts and makes your conversion rates look worse than they are.
The brands making the most money from email aren't the ones with the biggest lists. They're the ones who know exactly what's working, why it's working, and how to scale it. That clarity starts with clean, accurate tracking. Once the measurement is right, everything else from optimization, investment decisions, flow strategy to segmentation gets easier because it's grounded in data you can actually trust.
Frequently Asked Questions
Why does my ESP show more revenue than Shopify?+
Do I need GA4 if I already have Shopify Analytics?+
What attribution window should I use in Klaviyo?+
How much revenue should email be driving?+
How do I track revenue from flows, not just campaigns?+
What is revenue per recipient and why does it matter?+
Do I need Triple Whale or Northbeam?+
What is Elevar and do I need it?+
Still Need Help?
Ready to stop leaving revenue untracked? We'll set up your full email attribution system with UTMs, ESP integration, GA4, and reporting so you know exactly what's working and can start scaling it.
